
Let's start by placing a COPY of your backup files on the Desktop of your computer. You can retrieve your last backups from a USB drive you've saved them to, or from the Studio Organizer Data folder. Make sure you're using the most current backup files you have.
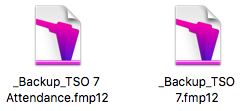 1) If you have backups of your data on a USB flash drive, copy your two backup files to the Desktop.
or
Macintosh Users: Open your existing Studio Organizer 7 folder and move the two backup files to the Desktop.
or
Windows Users: Open your existing Studio Organizer 7 folder, open the Data folder and move the two backup files to the Desktop.
2) If you have a Studio Organizer 7 folder installed on this computer, rename the folder "Old Studio Organizer 7".
Do not skip this step, otherwise you will overwrite your data!
3) Click a link to download the latest copy of Version 7: Windows • Macintosh
Install Version 7 on your Desktop. Do not open the software.
4) Macintosh Users: Open the new Studio Organizer 7 folder.
or
Windows Users: Open the Studio Organizer 7 folder, then open the Data folder.
5) Macintosh Users: Copy the 2 backup files into the Studio Organizer 7 folder
or
Windows Users: Copy the 2 backup files into the Data folder.
6) Close the Studio Organizer 7 folders.
7) Open the software (no password required).
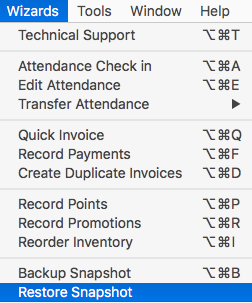
8) Go to the Wizards menu at the very top of the computer screen and select Restore Snapshot. Follow the onscreen prompts. This will transfer all of your backup data into the new version of the Studio Organizer 7.
This will give you peace of mind knowing your data is always in your pocket.