Networking the Studio Organizer 7

Using Version 6?
Click here for Networking instructions.

Since it's not possible to record attendance while using other features of the Studio Organizer on a single computer, networking is a great way to dedicate a computer to attendance check in, but it's not required.

To spare you the expense of networking, the Studio Organizer offers you the ability to dedicate a computer to attendance recording without networking. Please read "Attendance Computer: No Network Required" in the built in Help.

Finally, if you would like to simply move your data from one computer to another the Transferring Data Wizard is a very popular free feature. Keep in mind the software can only be used on one computer at a time when using the Transferring Data Wizard.

iPad Users

Unfortunately the only way to use the Studio Organizer on your iPad is to follow the instructions below and share your data with a host computer over your Wifi network. This is a limitation of the FileMaker Pro programming environment.

The instructions for configuring your iPad are at the bottom of this page and iPads can only be connected after all of the previous steps describing the network setup have been completed.

Also, if you'd like to use an iPad for attendance recording please note the Manual Attendance Recording Wizards work great, but the Automated Attendance Check In Wizards are not available on iPads due to limitations of mobile devices.

Networking is an optional feature which allows you to share the Studio Organizer in real time between up to nine computers and and nine iPads using your wireless network.

The Studio Organizer is cross platform ready. That means you can have Macintosh, Windows computers and iPad's all sharing your Studio Organizer data in real time on your Wifi network.

Networking requires the purchase of FileMaker Pro 13 software. (Do not use FileMaker Pro 14 or 15 due to incompatibilities and frequent crashes*.) You can purchase FileMaker Pro 13 or FileMaker Pro Advanced 13 from eBay, Amazon or any source you wish. Expect to pay roughly $150 per software license and you'll need one software license for each computer that will be using the Studio Organizer.

Questions & Answers

Please scroll down and read the networking information below.

iPad's Only
If you'd like to share the Studio Organizer with only iPad's, you'll buy one network seat. This will allow you to share the Studio Organizer with one computer and up to 8 iPad's using your wireless network.

Computers & iPad's

Please purchase one network license for each computer that will be using the Studio Organizer. Up to 8 iPad's can be share the Studio Organizer using your wireless network. So if you'll be having two computer running the Studio Organizer (and up to 8 iPads) you'll purchase two network licenses.

Unfortunately no. Apple Computer owns FileMaker Inc. and they will only make an app for iPads and iPhones.

No. There will be some Studio Organizer features that will only be accessible from a computer. This is due to limitations in the iPhone and iPad functionality.

The Automated Attendance Wizards are not available, but the Manual Attendance recording Wizards are.

Also, your data files are not transferred to your iPad. Instead, you'll open the Studio Organizer on your computer (which acts as a server) and the FileMaker Go! app installed on your iPad. Your data is then shared from the server to the iPad using your Wifi network.

Yes! Here's an overview of the setup required:

The Studio Organizer was created using FileMaker Pro. You install FileMaker Pro on a computer that’s connected to the internet with a fixed address. This is called a Static IP address. You then open your Studio Organizer files on this server and users that know your Static IP address, and the password, and have FileMaker Pro installed on their computer can now access the database. Instead of using your local network to share the data, the data is shared over the internet.

iPad's can access the data too, but you can only have a total of 9 devices using this method. Ask your Internet Service Provider to provide you a static IP address. They will charge you a monthly fee for this, but they're quite affordable. Once this is done you'll purchase one networking license for each computer (including the server) and setup your network as described below.

You'll then have a computer expert setup your server to use the Static IP address. Once this is done, you'll be able to connect to your data using an internet connection and the Static IP address. (If this sounds like techno-babble, don't worry. Ask your computer guru to handle this. Setting up a Static IP address is very commonly done by techies.)

Finally, if you’d like more than 9 devices, or if you’d rather not go through the trouble of setting up a Static IP address, there are companies that will rent you time on their FileMaker Pro servers. Expect to pay about $30 per month.

Both FileMaker Pro 14 and 15 crash frequently. This is true on both Windows 10 and Mac OS X. Also, neither of these 'upgrades' offer any significant new features. FileMaker Pro 13 however is quite stable.

FileMaker Pro 14 must always be run in 32-bit mode in order to use the plugins used for encryption, file transferring and registration.

On Windows computers FileMaker Pro 15 must always be run in 32-bit mode to use the plugins used for encryption, file transferring and registration.

On Macintosh computers FileMaker Pro 15 will not run the plugins used for encryption, file transferring and registration.

Only FileMaker Pro 13 is certified for use with the Studio Organizer.

Networking the Studio Organizer

Designate a Server

Pick one computer that will be the server or host. We'll refer to this computer as the server, but that doesn't mean this computer should be a high end computer or one that's marketed specifically as server. It should just be a fairly fast machine and it should be the one where the Studio Organizer will be running in the foreground most of the time. As soon as you switch to a different program on the server the performance of all the guest computers will drop significantly.

Your server will be the only computer that has the Studio Organizer files installed on the hard drive. The guest computers should only have the FileMaker Pro 13 software installed on them.

About FileMaker Pro

The StudioOrganizer.com does not charge a networking fee, however FileMaker Pro 13 software must be purchased. This software must be installed on each computer. Also, the "runtime" version of the FileMaker Pro 13 software must be removed. The Runtime is included when you download the Studio Organizer, but the runtime version does not allow users to network.


Users can purchase FileMaker Pro 13 or FileMaker Pro 13 Advanced from eBay or Amazon.com. FileMaker Pro 14 and 15 are not recommended.

The last version of FileMaker 13 was 13v09.

Network Hardware Required

Since networking is a job best left to a professional, please ask your computer expert to print this article. In order to network the Studio Organizer, you must have a computer network installed at your location. This requires additional hardware such as a router or wireless hub, wiring, ethernet cards, etc.

If you have questions, please email technical support but be advised, the Studio Organizer tech support probably won't be your best bet if you have network hardware or operating system questions. We'll be happy to help, but our area of expertise is with the Studio Organizer software.

Is the Studio Organizer Up to Date?

Before you begin, please be sure you are using the most current version of the Studio Organizer.

To do this, open the Studio Organizer and go to the Wizards section, click on Data, then click the Check for Updates button. Since updating the Studio Organizer is different than other software, be sure to follow the Updating instructions.

Registration Required

When you purchase the Studio Organizer your registration is assign to one computer. This is your Primary computer. When you're networking, you want to be sure your server is registered as your Primary computer. 

Please be sure you have the Studio Organizer installed on — and register to — your server before proceeding.

Important Networking Information

• Set up your network after hours. Don't tackle this when you have a school full of kids. It will take some time and there may be some troubleshooting involved.

• There is no Save command. All of your data is automatically saved to the server when you switch to a different screen, hit the Enter key on your number pad, or quit.

• Only one user can modify a record at a time. Hit the Enter key on the number pad to save the changes you've made to a record and release that record for another user to modify.

• If the server is not running the Studio Organizer in the foreground, all guests will experience slower than normal response times.

• All guests must quit the Studio Organizer before the server can shutdown.

• Transferring files and updating to a new version of the Studio Organizer must always take place on the server with no guests connected.

• Do not give out the Master password to staff members.

Port 5003
Port 5003 is used by FileMaker Pro to send network traffic. Please be sure this port is open in router and computer firewalls and is not being used by any other services.

Step 1 - Install FileMaker Pro 13 on the Server

Select a computer that will be your Server and install and register the Studio Organizer 7 on this computer. Purchase FileMaker Pro 13 or FileMaker Pro 13 Advanced from eBay or Amazon.com and install it on this computer. Use the software license key provided by the seller.

Your Server will host your files and guest computers will connect to this computer using your router. This means there's your Studio Organizer data files are shared on your wifi network. Your Server will be the only computer that has both FileMaker Pro 13 and the Studio Organizer data files installed on the hard drive. The guest computers will only have the FileMaker Pro 13 software installed on them.


If you purchased FileMaker Pro 13 from the Studio Organizer.com and have an existing network license for the Studio Organizer 5 or 6 an email containing your FileMaker Pro 13 license key and a link to download the FileMaker Pro 13 software was sent to you. We can resend this email if you don't have it handy. Using the links in the email, download FileMaker Pro 13 and run the installer.

When prompted for customer information, enter your school name in the User Name field.

The Organization field MUST contain only:

    the Studio Organizer

To enter your License Key you can copy and paste your software license key from the email you received.Install FMP 13 dialog

If you purchased FileMaker Pro 13 from the Studio Organizer.com the Organization field must contain the Studio Organizer or registration will fail.


Step 2 - Remove the FileMaker Pro Runtime

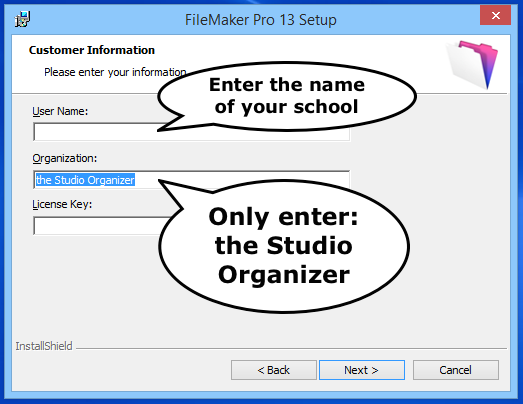
Open the Studio Organizer folder on your server.

PC users open the Data folder.

Delete the Studio Organizer runtime application. The icon looks like this: 

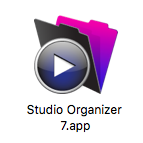
This is a runtime version of FileMaker Pro which is not networkable. Delete it.

This is done as a precaution to prevent the Studio Organizer files from being opened with the free runtime version of FileMaker Pro.

Step 3 - Launch the Studio Organizer on the Server

Now let's open the Studio Organizer files on the Server using FileMaker Pro 13.

Launch FileMaker Pro 13, go to the File menu and select Open.

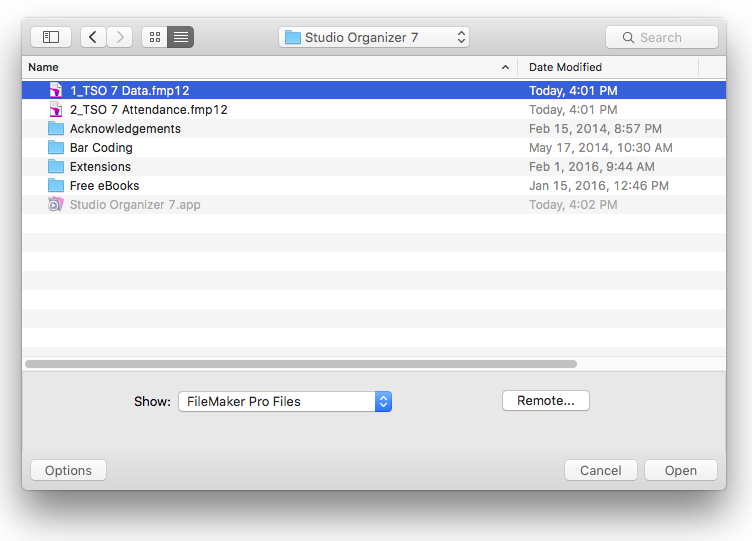
Locate the Studio Organizer 7 folder on the Desktop.

PC users open the Data folder.

Locate and open the 1_TSO 7 Data.fmp12 file.

When prompted for a password, enter Master in the account name field, then the Master password you created when you registered Version 7.


This will open the Studio Organizer.

Step 4 - Enable File Sharing

Go the File menu and select Sharing -> Share with FileMaker Clients...

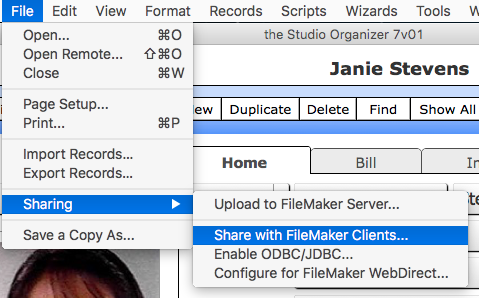
Turn Network Sharing On.

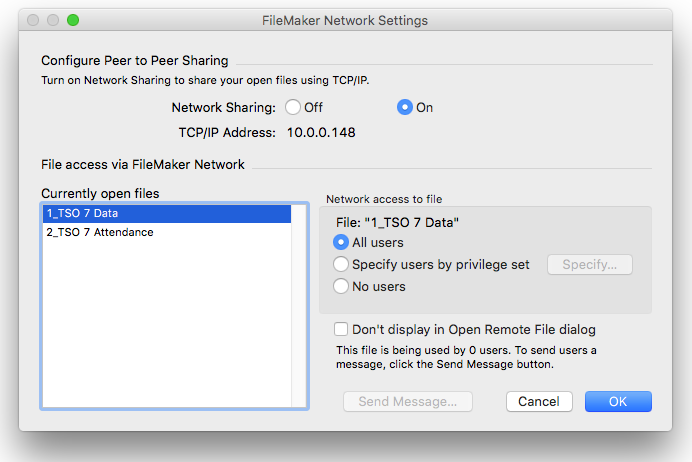
Under "Currently Open Files" select each file, then apply these settings:

1_TSO 7 Data = All Users   •   Do NOT check "Don't Display in Open Remote File Dialog"
2_TSO 7 Attendance = All Users   •   CHECK "Don't Display in Open Remote File Dialog"


Click OK.

Port 5003
Port 5003 is used by FileMaker Pro to send network traffic.

Please be sure this port is open in router and computer firewall's
and is not being used by any other services.

Step 5 - Create a Server Account (Optional)

If you would like to protect the server so it can be left unattended and no one can tamper with the Studio Organizer, you can create a special password just for opening the server that has access to only the School Info screen.

To do this, click the School button in the top right corner of the screen, then click the Staff button.
Create a new staff record (watch instructional video) with a first name of Server, last name of Setup.
Switch to the Passwords screen.
Click the New button and create a password for the "Server Setup" record. (Watch instructional video)

Account Name = Server Setup
Access level = Staff
Password & Hint = {your choice}
Access = Uncheck all boxes except School Info

Step 6 - Create Staff Passwords

If you have not already done so, go to the Staff screen and create staff records and passwords for each staff member. Since the Master password cannot be changed, it should never be given to staff members.

If you have completed Step 5 above, quit FileMaker Pro and open the Studio Organizer as described in Step 3 above, then enter the Server Setup account name and password you've just created. Now, only the School Info screen can be displayed on the server until you quit and re-open with the Master password.

You are now sharing your the Studio Organizer files.

If you quit the Studio Organizer on the server, all guests will be prompted to disconnect.
All guests must exit before the server will close the Studio Organizer.

iPad Users

If you've purchased only one FileMaker Pro software license, you can skip the steps for setting up guest computers. 

Click here to jump to the remaining server setup and iPad instructions.


Step 7 - Configure the Guests

Install FileMaker Pro 13 on each guest computer. See Step 1 above for installation details.

Do not install the Studio Organizer on any guest computers.

Step 8 - Launch the Studio Organizer on the Guest Computers

To do this, go to each guest computer and complete these steps.

Open FileMaker Pro, then go to File and choose Open Remote

FileRemote

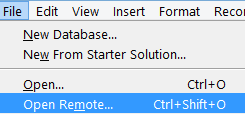
Or click the Remote... button in the bottom right corner of the Open screen.

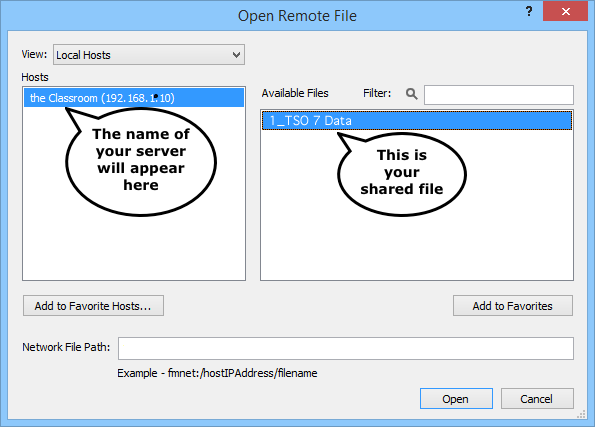
Now make the following menu selections in this dialog box:

View: Local Hosts
Hosts: {Select your server}
Available Files: 1_TSO 7 Data

In this screen shot "the Classroom" is the name of the server, but your server name will appear here if you've completed Step 4 above.

Select your server, then select the 1_TSO 7 Data file, then click Open, and enter the account name and password you wish to use on this guest computer. Feel free to use the staff passwords created in Step 6.

Do not use the Master password or give it to any staff members. The Master password should be kept confidential.

If you're unable to see your host computer in the above dialog box, click here for troubleshooting suggestions.

Step 9 - Create a Shortcut or Alias on each Guest Computer

For your convenience create a shortcut or alias of the FileMaker Pro application and place it on the desktop of each guest computer.

To do this, open the FileMaker Pro folder and create a shortcut or alias of the FileMaker Pro application file and move the shortcut or alias to the Desktop.


Server Do's and Don't

Ideally the only program running on the server should be FileMaker Pro.

FileMaker Pro should be in the foreground at all times. This may not be possible, but know if you switch to another program or minimize FileMaker Pro, this will slow down the guest computers.

The server should be set to never go to sleep or hibernate. Otherwise all users will be disconnected.

Be sure the Studio Organizer files have opened completely on the server before connecting guests.

Port 5003 is used by FileMaker Pro to send network traffic. Be sure this port is open in router and computer firewall's and is not being used by any services.

Guest Computer Startup Procedure

Now you're ready for your guests to open the Studio Organizer. Here are the steps:

1) The server must be hosting the files.

2) The guest will double click the FileMaker Pro alias or shortcut, or open the FileMaker Pro software in any fashion you wish.

3) After FileMaker opens, select the File menu, then click Open Remote.

4) Select the Host, then double click 1_TSO 7 Data.

5) Enter a staff account name and password you've created.

Congratulations! You're now ready to begin to use the Studio Organizer on each of your networked computers.

iPad Instructions

Your iPad will use your wireless network to share your data files with your server.

The Studio Organizer 7 will only run on your iPad if it is open and running on your server computer.

Just like on a computer, your iPad will need to have the FileMaker Pro software installed. It's called FileMaker Go! and it's free.

Step A - Install FileMaker Go 13

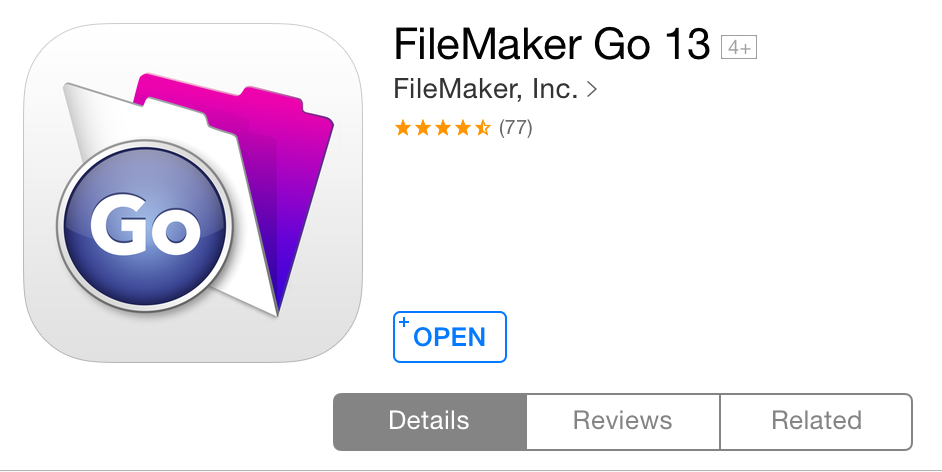
Open the App Store on your iPad and search for FileMaker Go 13. It's a free app, from FileMaker Inc. Download and install the app on your iPad. (If Version 13 is not available, you can use Version 14 or 15 of FileMaker Go!)


Go

Step B - Launch FileMaker Go

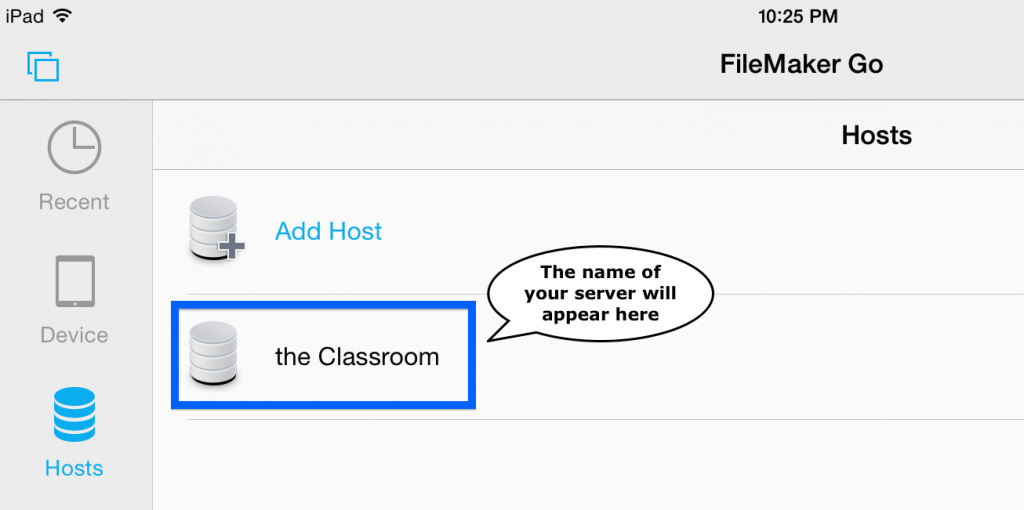
Open FileMaker Go! and tap the Hosts button on the left then tap on the name of your server.

In this screen shot "the Classroom" is the name of the server, but your server name will appear here if you've completed Step 4 above.


iPadHosts


Step C - Open the Studio Organizer

Tap 1_Studio Organizer, then enter your Account Name and password.


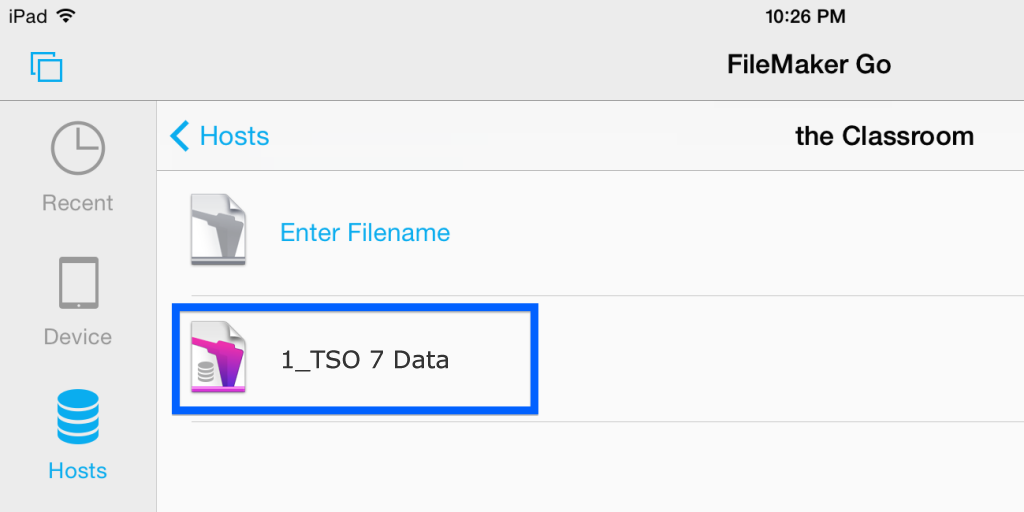
Congratulations! Your iPad is now connected to the server.


Ideally the only program running on the server should be FileMaker Pro. It should be in the foreground at all times, and the server should be set to never go to sleep.

Also, be sure the Studio Organizer files have opened completely on the server before connecting your iPad.

To properly save your data, be sure to close the Studio Organizer on your iPad before turning it off.