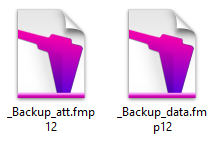
Computers are far from perfect (and so are we) so if your computer has crashed and you've had to re-format it, or you've had switch computers, or you've goofed and deleted your data somehow, don't worry. You can always restore you backup data into a fresh copy of the Studio Organizer.
Let's start by placing your backup files on the Desktop of your computer.
 1) If you have backups of your data on a USB flash drive, copy your two backup files to the Desktop.
or
Macintosh Users: Open your existing Studio Organizer 6 folder and move the two backup files to the Desktop.
or
Windows Users: Open your existing Studio Organizer 6 folder, open the "Data (Do Not Modify Contents)" folder and move the two backup files to the Desktop.
2) If you have an old version of the Studio Organizer 6 installed on this computer, rename the folder "Old Studio Organizer 6".
3) Click a link to download Version 6v55: Windows • Macintosh
Install Version 6v55 on your Desktop. Do not open the software.
4) Macintosh Users: Open the new Studio Organizer 6v55 folder.
or
Windows Users: Open the Studio Organizer 6v55 folder, then open the “Data (Do Not Modify Contents)" folder.
5) Macintosh Users: Copy the 2 backup files into the Studio Organizer 6 folder
or
Windows Users: Copy the 2 backup files into the "Data (Do Not Modify Contents)" folder.
6) Close the Studio Organizer folders.
7) Open the software (no password required).
8) Go to the School Info screen.
9) Single click the Purchase button. Accept the Software License and complete the forms to create your Registration Code.
 New Registration Codes may take up to one business day to be activated.
10) Continue through the purchase screens and create your Master password.
11) When you're done, log in using your Master password you've just created.
12) If the Studio Organizer displays Registered To and your School Name, you can proceed to the next step.
When the password dialog box appears enter Master in the Account Name and the password you've just created in the Password field.
Next hold down the CONTROL key on your keyboard as you click the OK button. Keep the CONTROL key depressed until you see a window the "Verifying Registration" window. Then you can release it.
The software should now register.
13) Once your software registers, go to the Wizards menu and select Restore Snapshot. Follow the onscreen prompts. This will transfer all of your backup data into the new version of the Studio Organizer.
This will give you peace of mind knowing your data is always in your pocket.