
Here's a fast way to update your Studio Organizer 7 files.
Go to the Wizards menu and select Backup Snapshot, then click the Backup button.

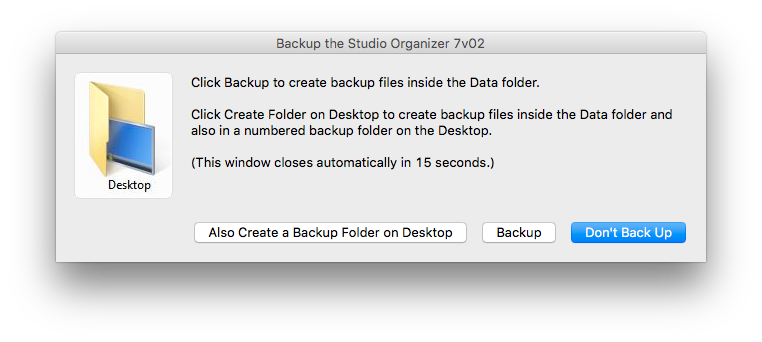
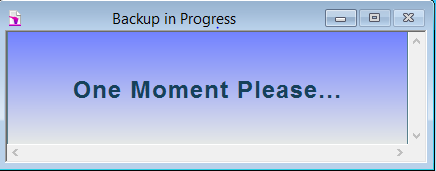
The software will begin backing up. This may take a moment.
After backing up has been completed, click Quit the Studio Organizer.
You can do this by clicking red Quit button next to Log Off in the bottom left corner of the screen.

Click the Download icon below to download the Studio Organizer update files.

Click to Download
After the download is complete, unzip/extract the archive.
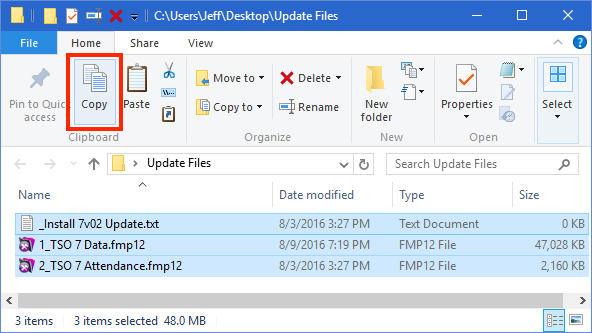
Open the Update Files folder and select all three files. Right click and select Copy.
Windows users can also click the Copy button on the Home menu.
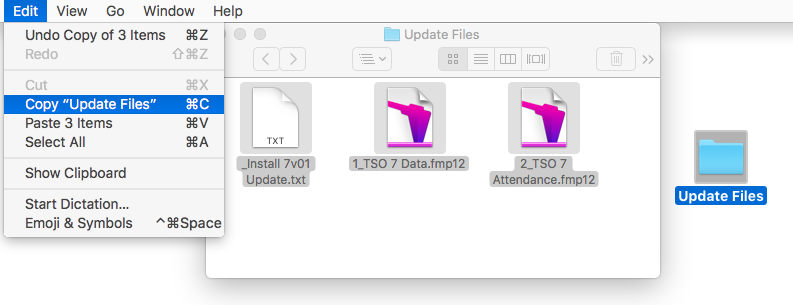
Macintosh users can select Copy from the Edit menu.
Windows Users
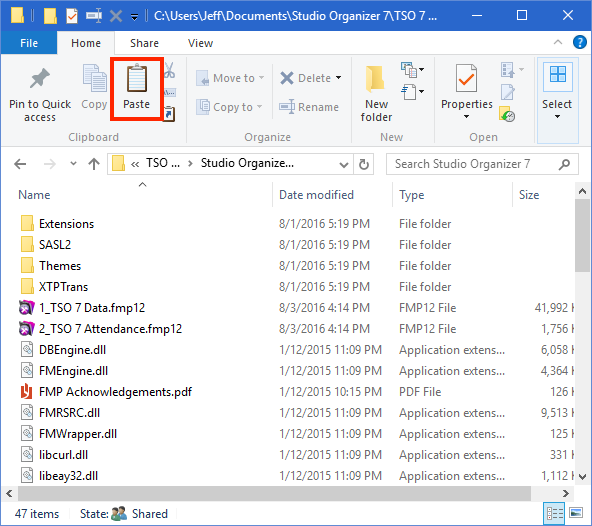
Locate and open your Studio Organizer 7 folder.
Open the Data folder.
Right click and select Paste or click the Paste button on the Home menu.
Macintosh Users
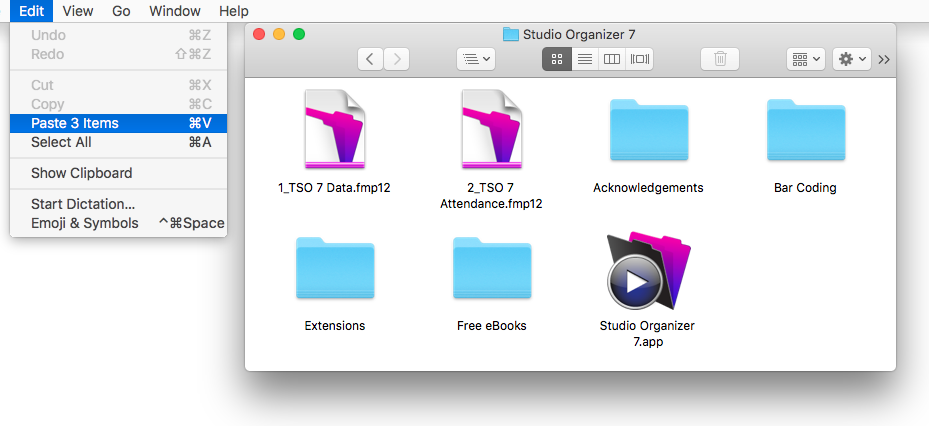
Locate and open your Studio Organizer 7 folder.
Right click and select Paste or select Paste 3 Items from the Edit menu.
When a warning dialog box appears stating these files already exist in this folder, click Replace to confirm you wish to overwrite the existing files.
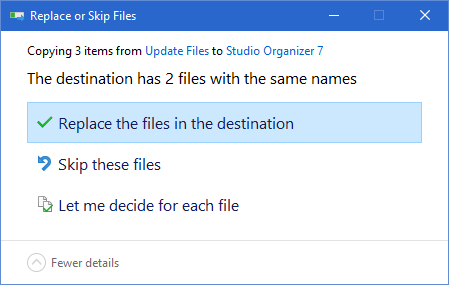
Windows Replace Dialog Box
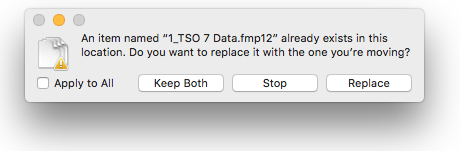
Macintosh Replace Dialog Box
Open the Studio Organizer 7 as you normally do. No password is required.
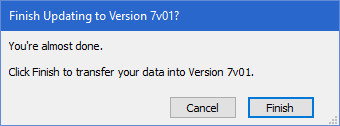
A Finish Updating to Version 7 dialog box will appear. Click Finish.
The Updating Wizard does all the work and will let you know when your data has been successfully transferred.
All of your data and photos will transfer. Nothing is lost.
After updating is complete you'll be asked to log into the software. Use your regular password.
The new version of the Studio Organizer 7 will open.